
Introduction
Welcome to a world where fantasy meets DIY! Have you ever dreamt of bringing a touch of whimsical enchantment into your home? Our step-by-step tutorial will guide you through creating your very own glowing mushroom lamp, a captivating piece that combines natural aesthetics with a magical glow. Perfect for adding a cozy ambiance to any room, this project is not only fun and rewarding but also allows for creative expression. Whether you’re an experienced crafter or a curious beginner, you’ll find joy in transforming simple materials into a stunning, illuminated work of art. Let’s embark on this enchanting journey and light up your space with the charm of a glowing mushroom!
Materials Needed
To embark on this magical crafting adventure, gather the following materials:
- For the Mushroom Body: Polymer clay (brown for the cap, off-white for the stem) or hot glue sticks (clear and brown/colored).
- For the Glow: LED fairy lights (warm white recommended for a cozy glow).
- For the Dripping Effect: Clear hot glue sticks or clear resin.
- For the Base: Dried moss or artificial moss.
- Tools: Hot glue gun (if using hot glue), sculpting tools (for polymer clay), craft knife, scissors.
Step-by-Step Instructions:
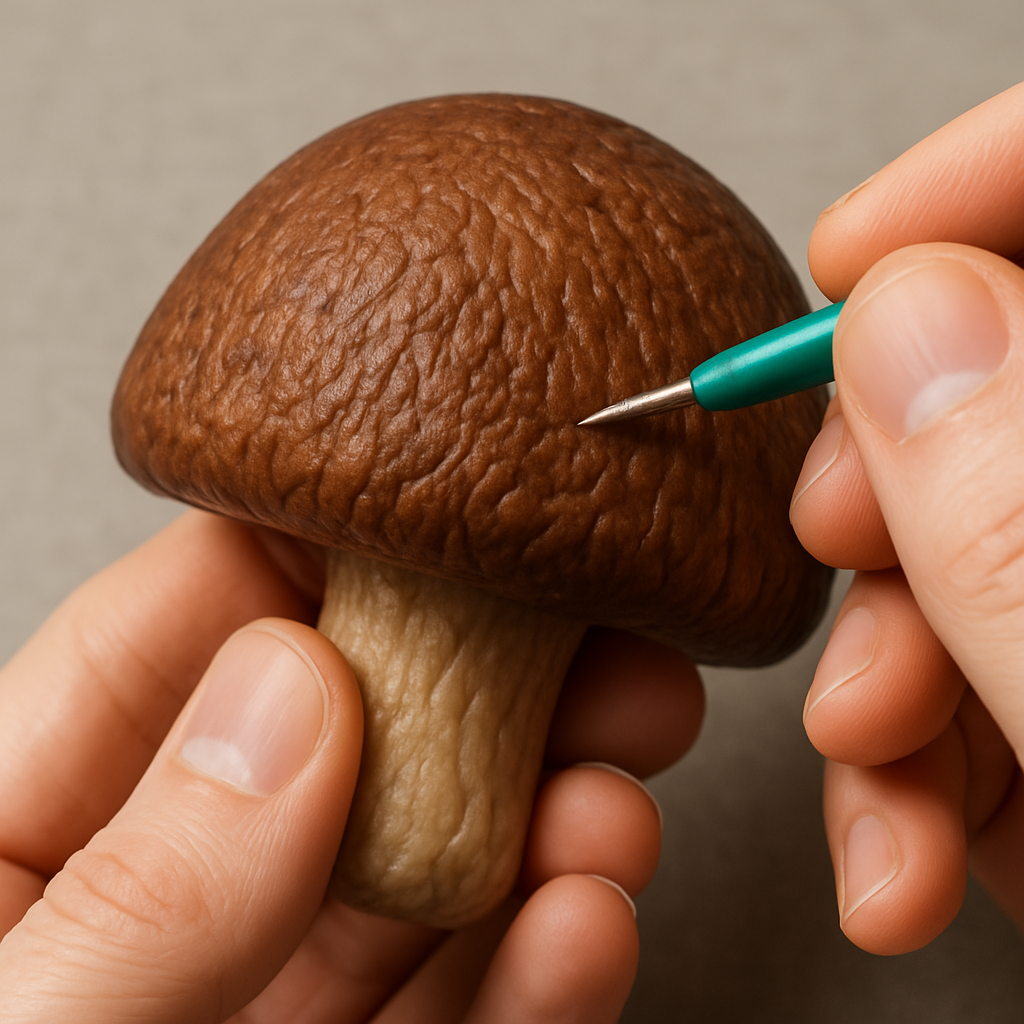
Step 1: Crafting the Mushroom Cap
Begin by shaping the mushroom cap. If using polymer clay, take a portion of brown clay and mold it into a dome shape, characteristic of a mushroom cap. Pay attention to creating a natural, slightly uneven texture on the surface to mimic a real mushroom. You can use sculpting tools or even your fingers to create subtle ridges and imperfections. If you are using hot glue, you can create a mold or freehand shape the cap, building up layers to achieve the desired thickness and form. Allow it to cool and harden completely before proceeding. The goal is to create a cap that looks organic and visually appealing.
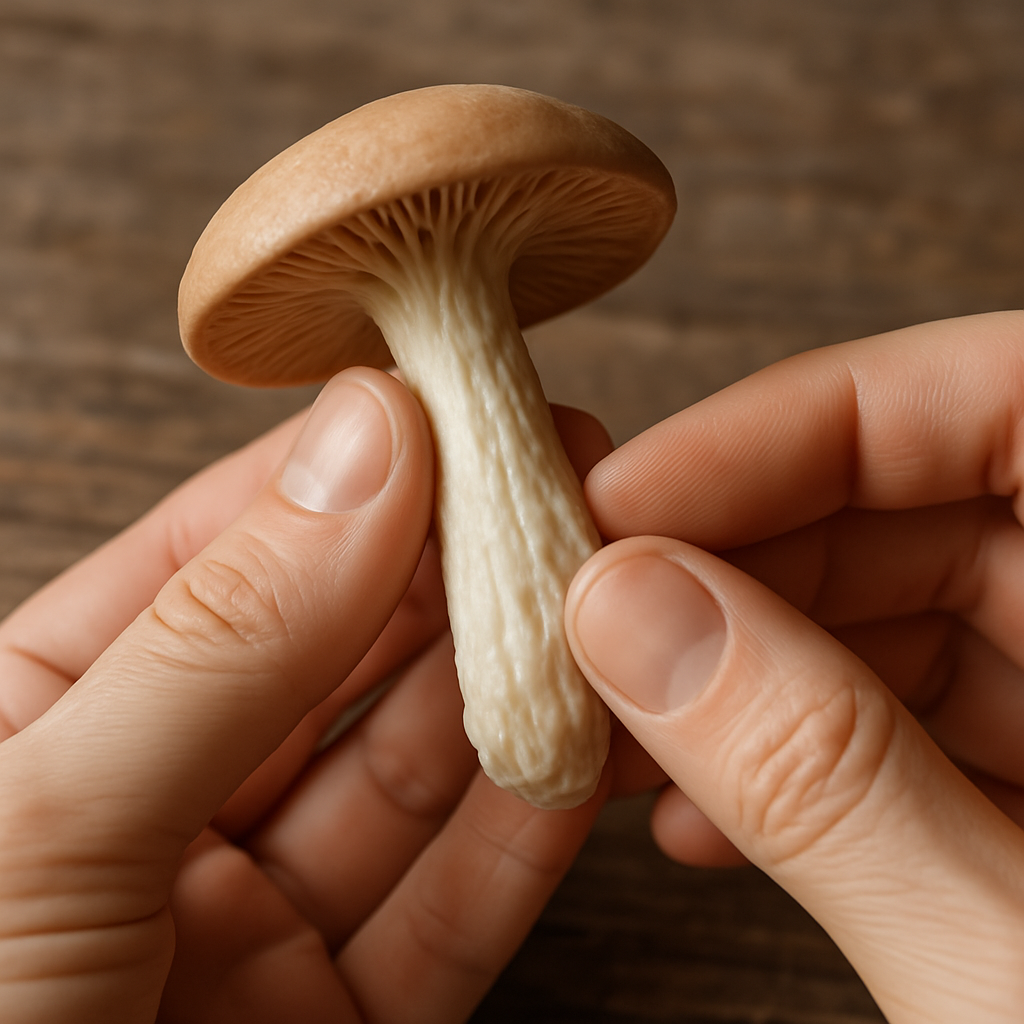
Step 2: Forming the Mushroom Stem
Next, create the mushroom stem. If using polymer clay, take the off-white clay and roll it into a cylindrical shape, wider at the base and slightly tapering towards the top where it will connect to the cap. Again, add subtle textures to make it look natural. If using hot glue, you can build up the stem in layers around a central support (like a cardboard tube) or freehand it, ensuring it has enough stability to support the cap. The stem should be hollow or have a cavity to house the LED lights later. Ensure the top of the stem is shaped to fit snugly with the underside of the mushroom cap.
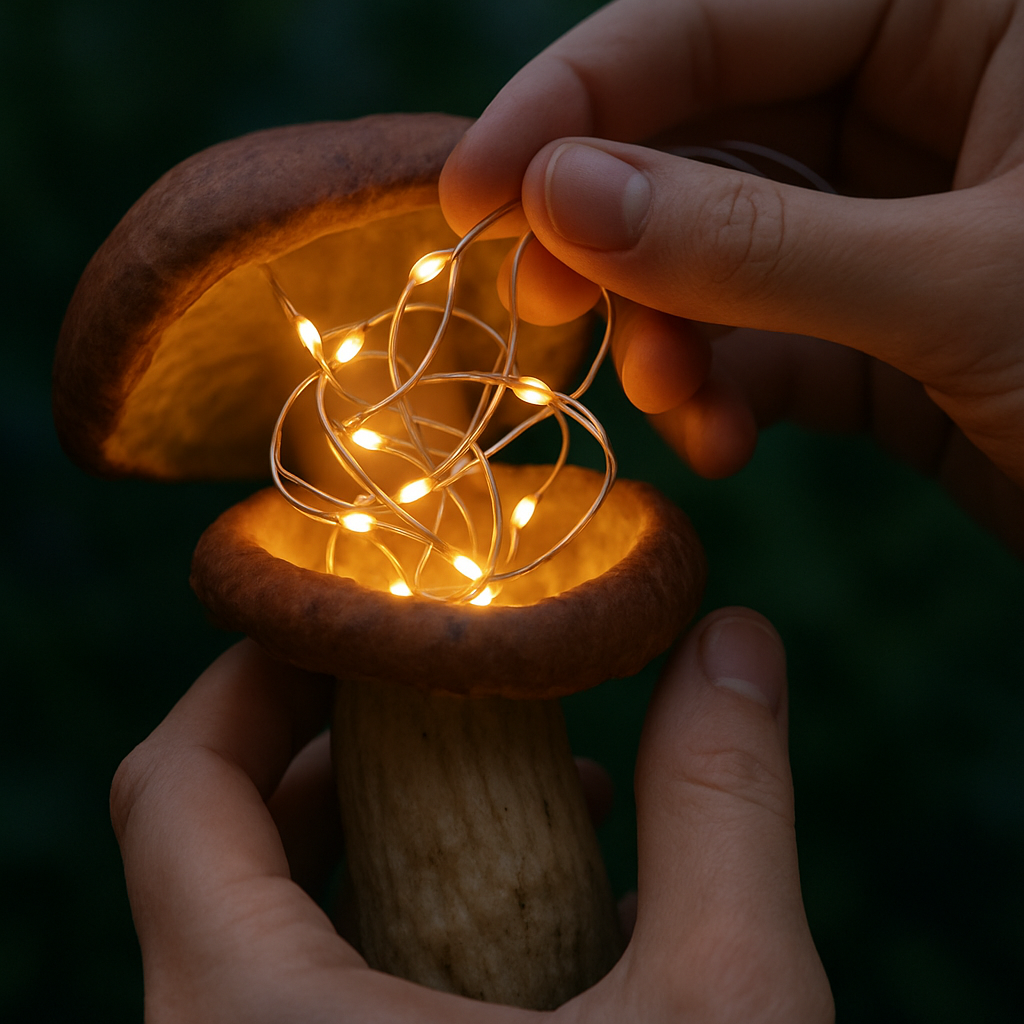
Step 3: Integrating the Light Source
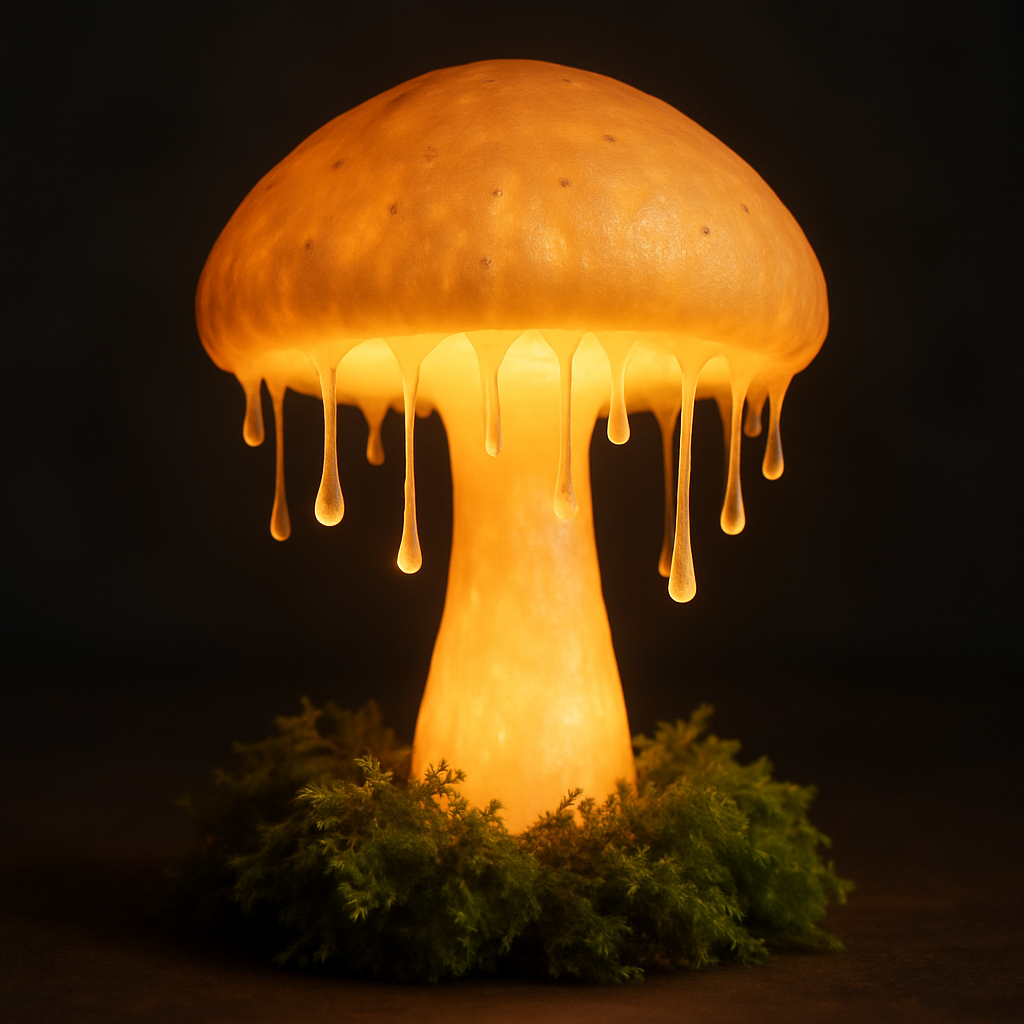
This is where the magic happens! Carefully insert the LED fairy lights into the hollowed-out stem and position them so that the light illuminates the entire mushroom from within. If your mushroom cap is also hollow, extend some of the lights into the cap as well. The goal is to achieve a soft, even glow that emanates from the mushroom. Secure the battery pack or power source for the fairy lights at the base of the stem, ensuring it’s easily accessible for turning the lamp on and off. Make sure the wires are neatly tucked away and not visible.
Step 4: Adding the Dripping Effect
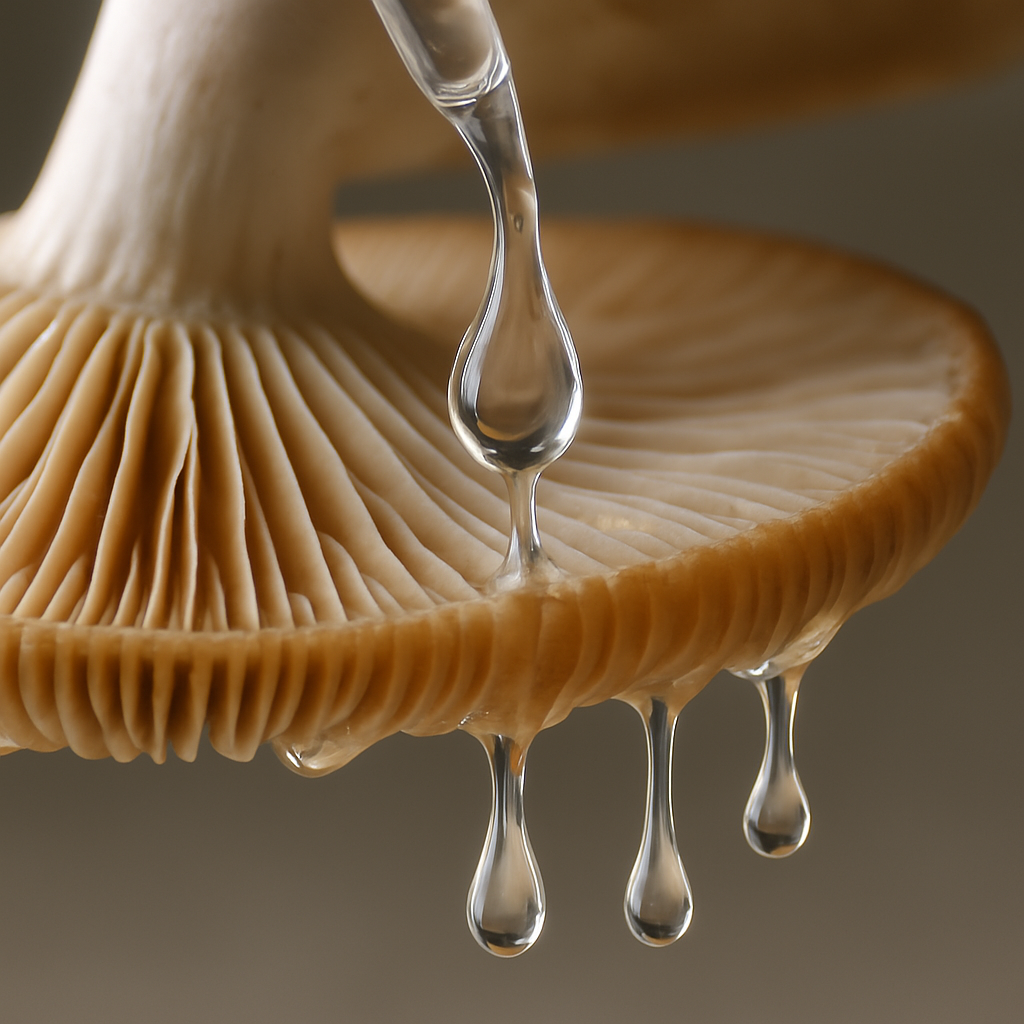
To create the enchanting dripping effect seen in our inspiration image, use clear hot glue or clear resin. Carefully apply small beads or lines of the material to the underside of the mushroom cap, allowing them to drip naturally. You can vary the length and thickness of the drips to create a more organic and realistic look. If using hot glue, work quickly as it dries fast. For resin, follow the manufacturer’s instructions for mixing and curing. The translucency of the material will allow the light from within to shine through, enhancing the magical appearance of the drips.
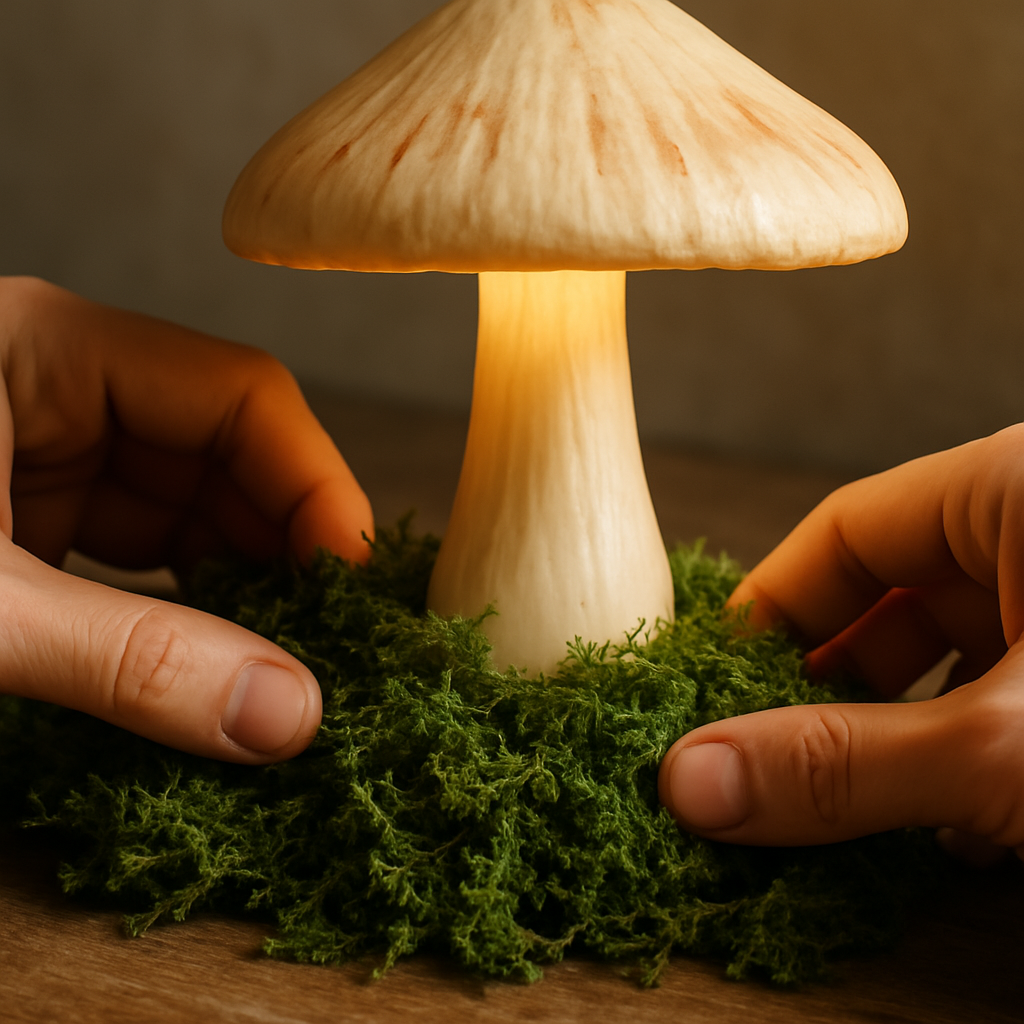
Step 5: Creating the Moss Base
To give your glowing mushroom lamp a natural and grounded look, create a moss base. Arrange dried or artificial moss around the base of the mushroom stem. You can use a small amount of hot glue to secure the moss in place, ensuring it forms a stable and aesthetically pleasing foundation. The moss adds a touch of realism and enhances the enchanting forest-like ambiance of the lamp. Feel free to add other small natural elements like tiny twigs or pebbles to further personalize your base.
Step 6: Assembling and Finishing Touches
Finally, carefully attach the mushroom cap to the stem. If you made them separately, use a strong adhesive or hot glue to secure them together. Ensure the light source is fully enclosed and the lamp is stable. Take a moment to admire your creation and make any final adjustments to the moss base or the position of the drips. Your DIY glowing mushroom lamp is now complete and ready to illuminate your space with its enchanting glow!
Conclusion
Congratulations! You’ve successfully crafted your very own glowing mushroom lamp. This enchanting piece is more than just a light source; it’s a testament to your creativity and a magical addition to any room. We hope you enjoyed this DIY journey and are inspired to explore more crafting adventures. Share your glowing mushroom lamps with us and spread the magic!