
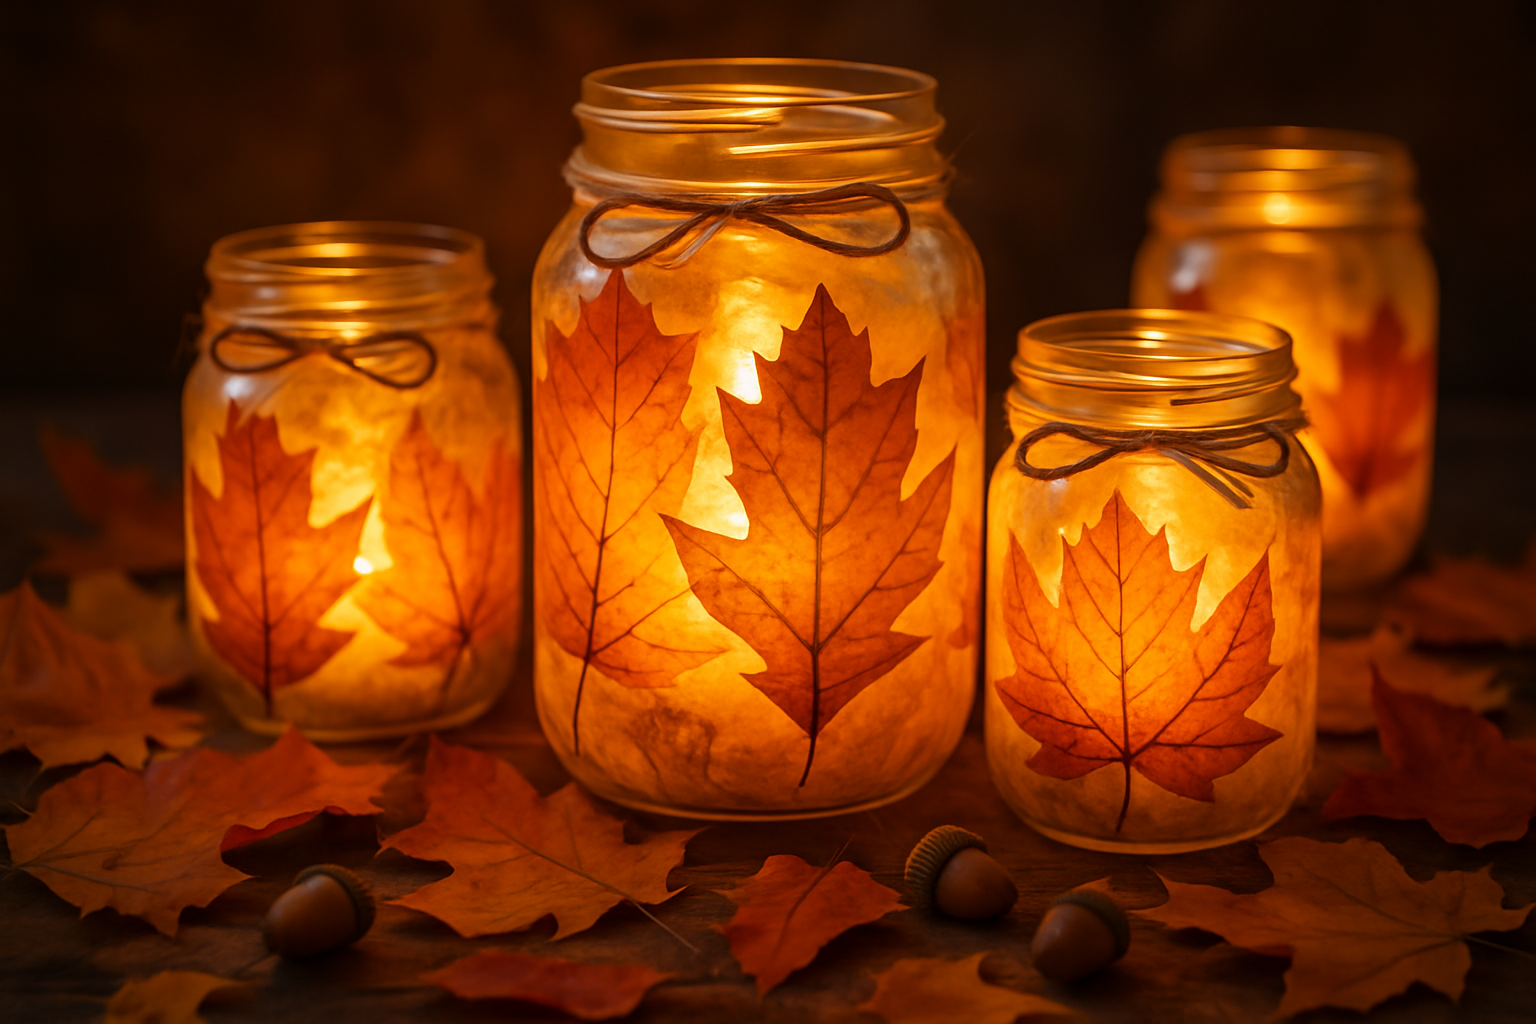
Welcome to a cozy crafting adventure! As the days grow shorter and the air turns crisp, there’s nothing quite like bringing the warmth and beauty of autumn indoors. Our latest DIY project, Mason Jar Leaf Lanterns, offers a simple yet enchanting way to capture the essence of fall. These charming lanterns, adorned with colorful leaves and illuminated by a soft glow, are perfect for adding a touch of rustic elegance to your home decor, whether as a festive centerpiece or a comforting accent on your mantelpiece. Get ready to transform ordinary mason jars into magical luminaries with this easy-to-follow guide.
Materials You’ll Need

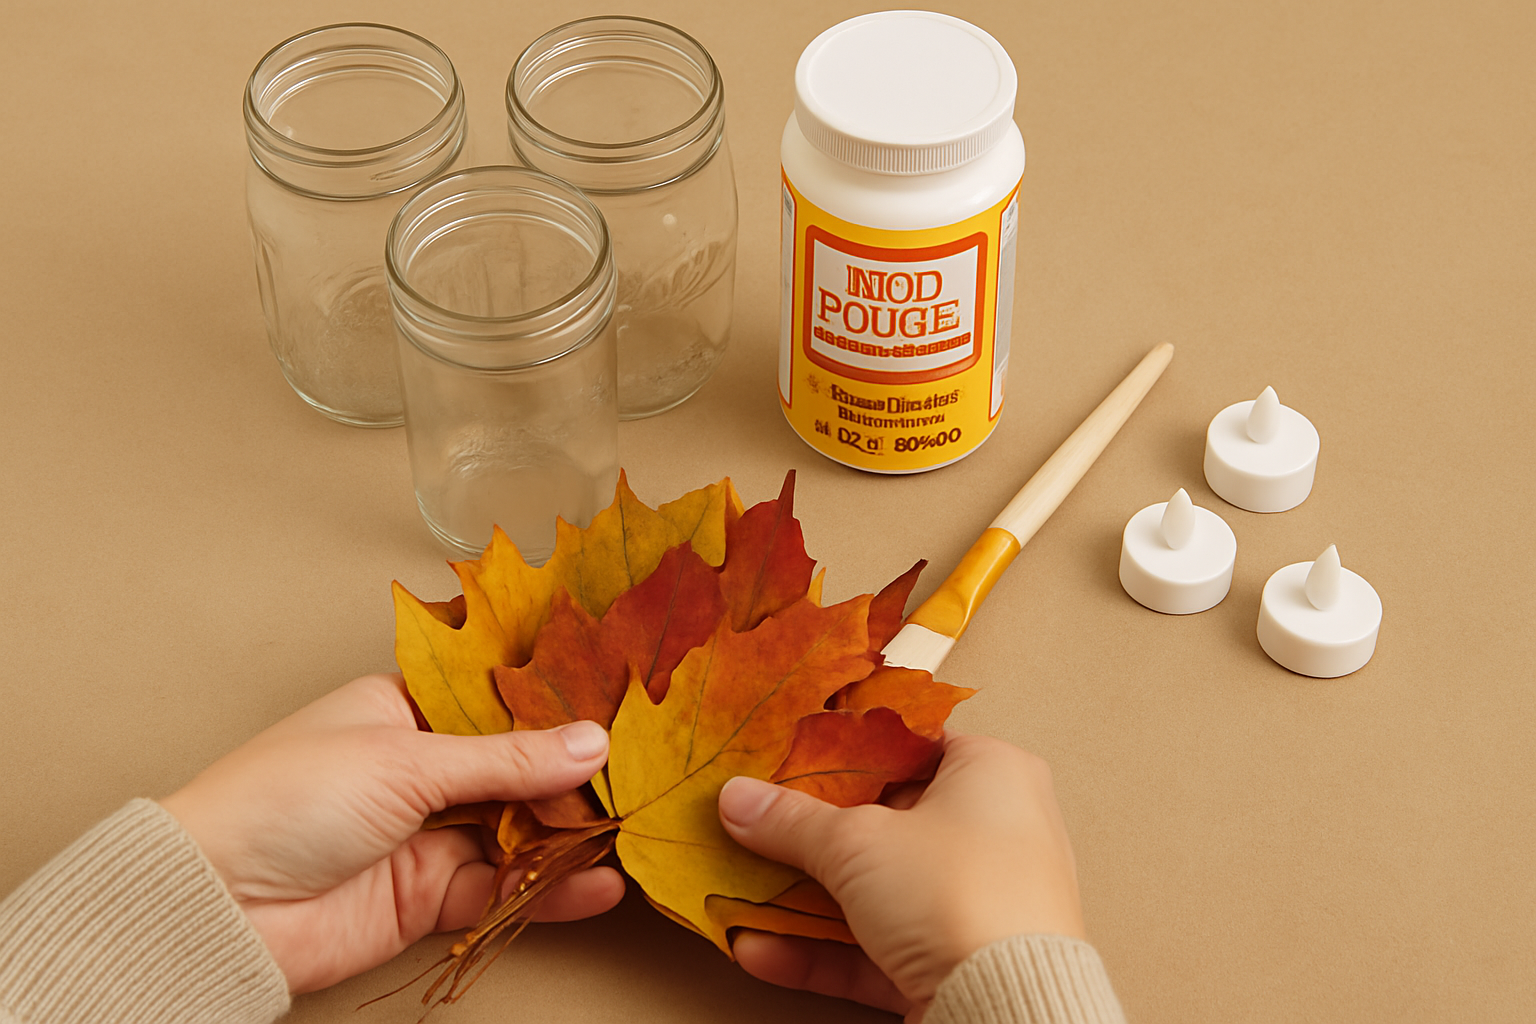
Before you begin, gather all your supplies. Most of these items can be found at your local craft store, or even in your own backyard!
- Mason Jars: Various sizes work best for a dynamic display. Clean and dry them thoroughly.
- Assorted Fall Leaves: You can use real leaves (pressed and dried for best results) or high-quality faux leaves for durability.
- Mod Podge: This all-in-one glue, sealer, and finish is perfect for decoupage projects. Choose a matte or gloss finish based on your preference.
- Foam Paintbrush or Regular Paintbrush: For applying the Mod Podge smoothly.
- Battery-Operated LED Tea Lights or Fairy Lights: These are safe and provide a warm, flickering glow without the fire hazard of real candles.
- Optional: Twine or Ribbon: For decorative accents around the rim of your finished lanterns.
Step-by-Step Instructions
Follow these simple steps to create your own beautiful Mason Jar Leaf Lanterns:
Step 1: Gather Your Materials
First things first, lay out all your materials on a clean, protected surface. Having everything organized will make the crafting process smooth and enjoyable.
Step 2: Prepare Your Leaves

If you’re using real leaves, it’s crucial to ensure they are clean and completely dry. For the best results and to prevent curling, press them flat between the pages of heavy books for a few days or even a week. This will help them adhere better to the jar.
Step 3: Apply Mod Podge to Jar
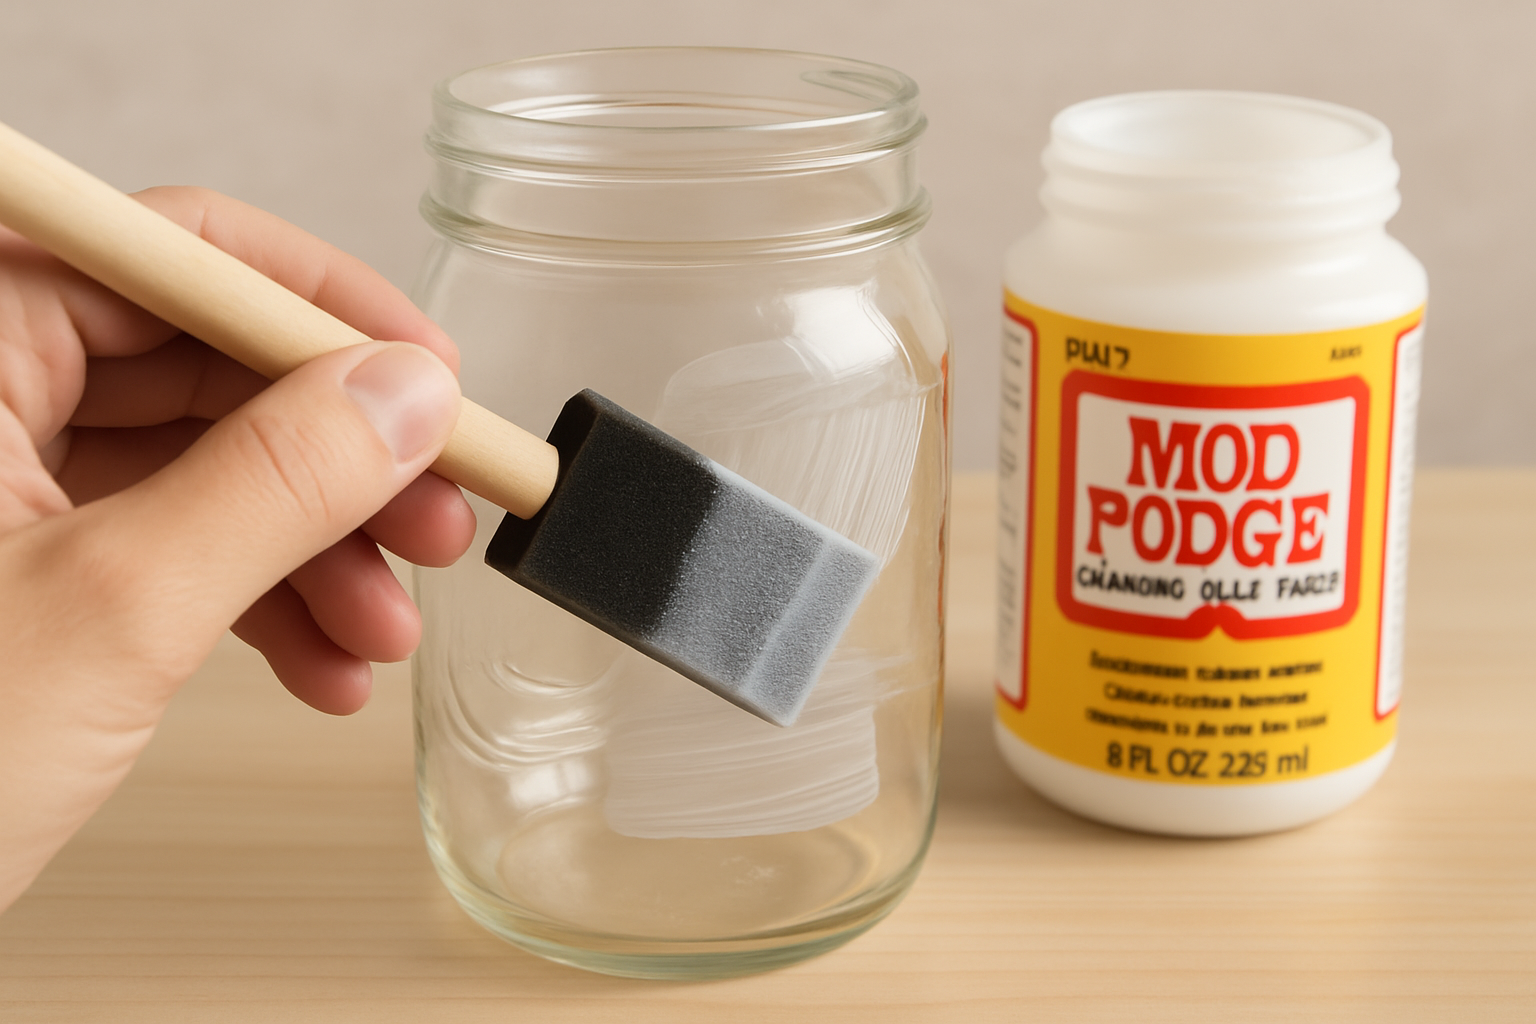
Using your foam or regular paintbrush, apply a thin, even layer of Mod Podge to a small section of the mason jar. Work in small sections to prevent the Mod Podge from drying before you can place your leaves.
Step 4: Attach the Leaves
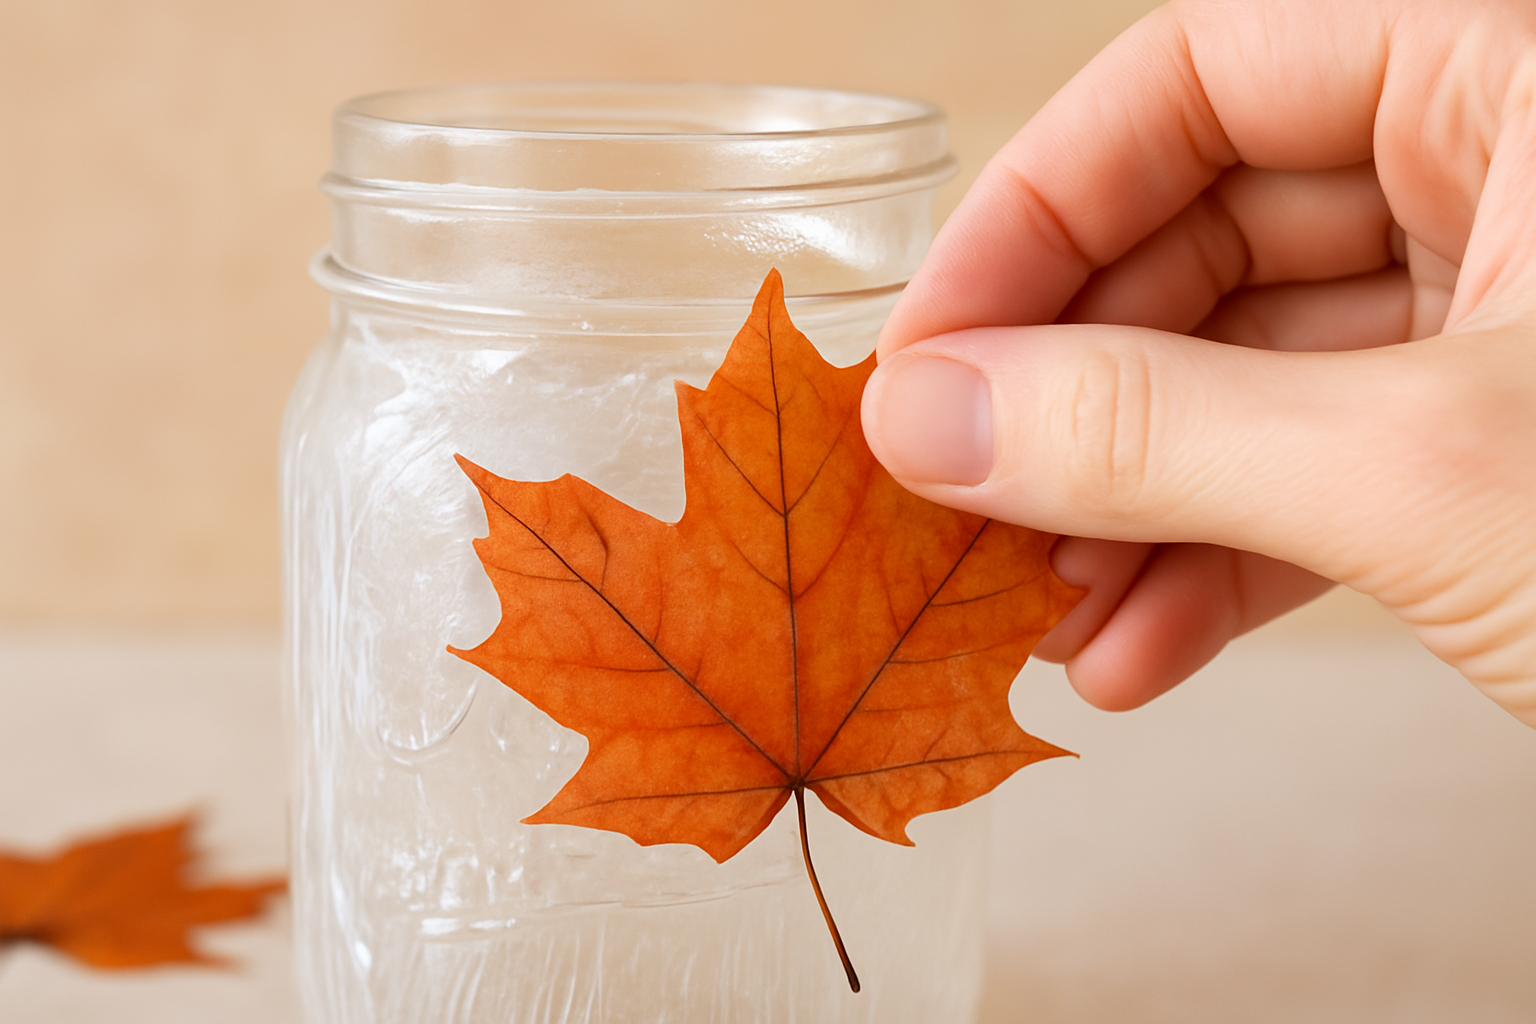
Carefully place a prepared leaf onto the Mod Podge-coated area of the jar. Gently smooth it down with your fingers or the paintbrush, working from the center outwards, to remove any air bubbles and ensure good adhesion. Don’t worry if it’s not perfectly flat; a little texture adds to the rustic charm.
Step 5: Seal the Leaves
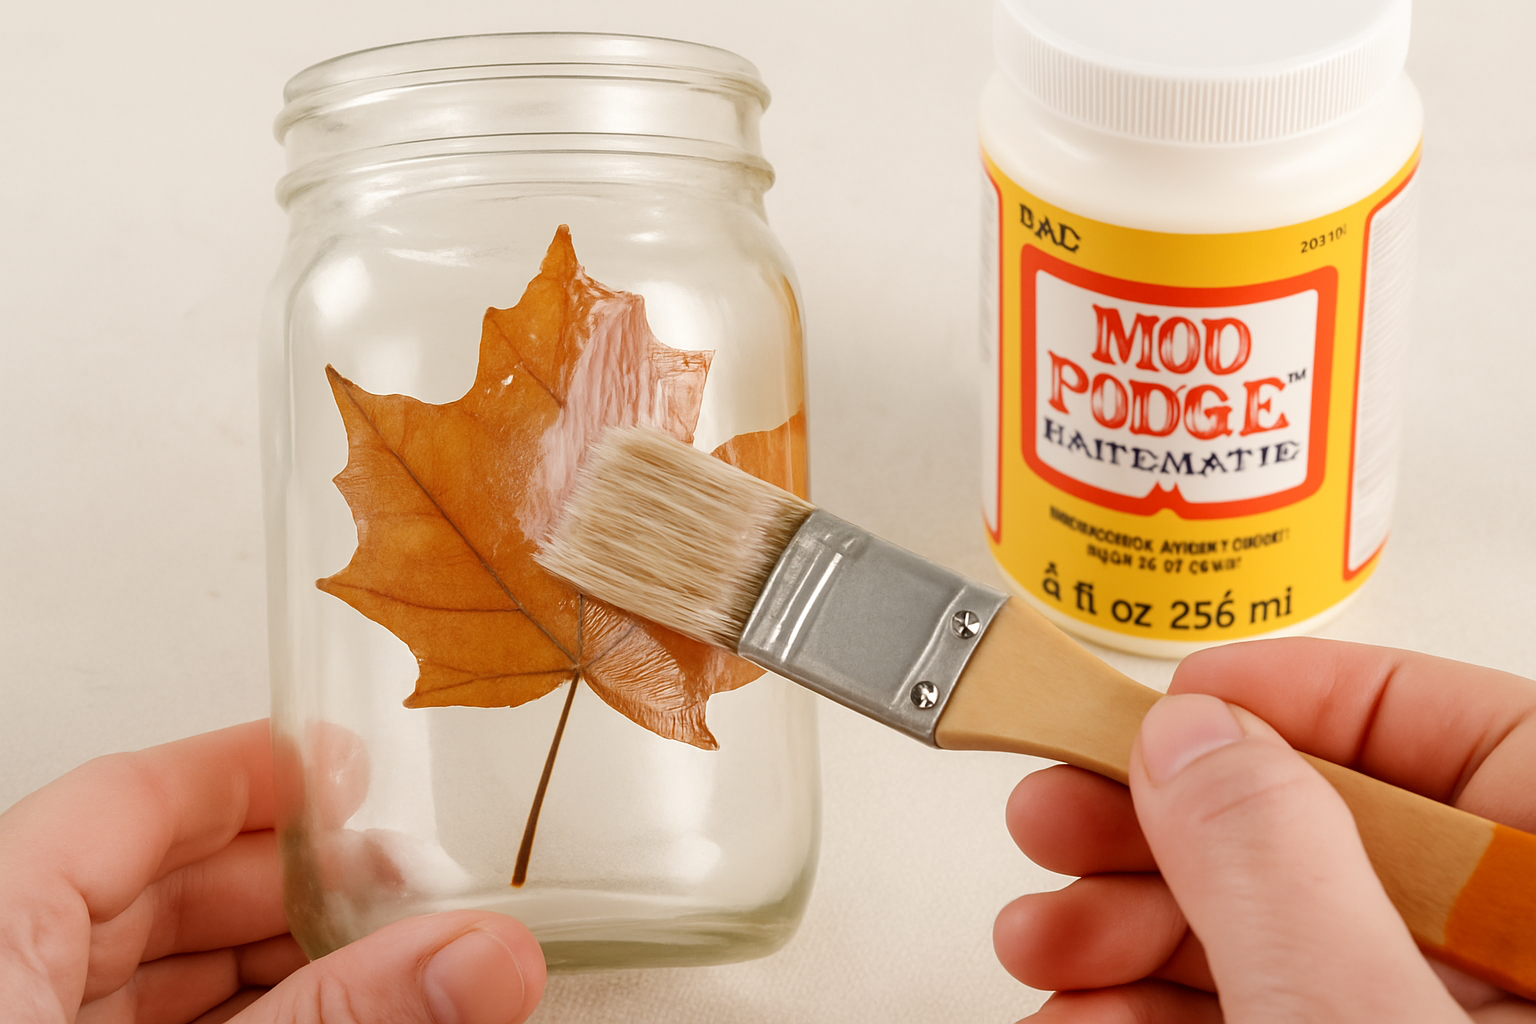
Once the leaf is in place, apply another thin layer of Mod Podge directly over the top of the leaf. This acts as a sealant, protecting the leaf and creating a translucent finish that will allow the light to shine through beautifully.
Step 6: Repeat for All Leaves
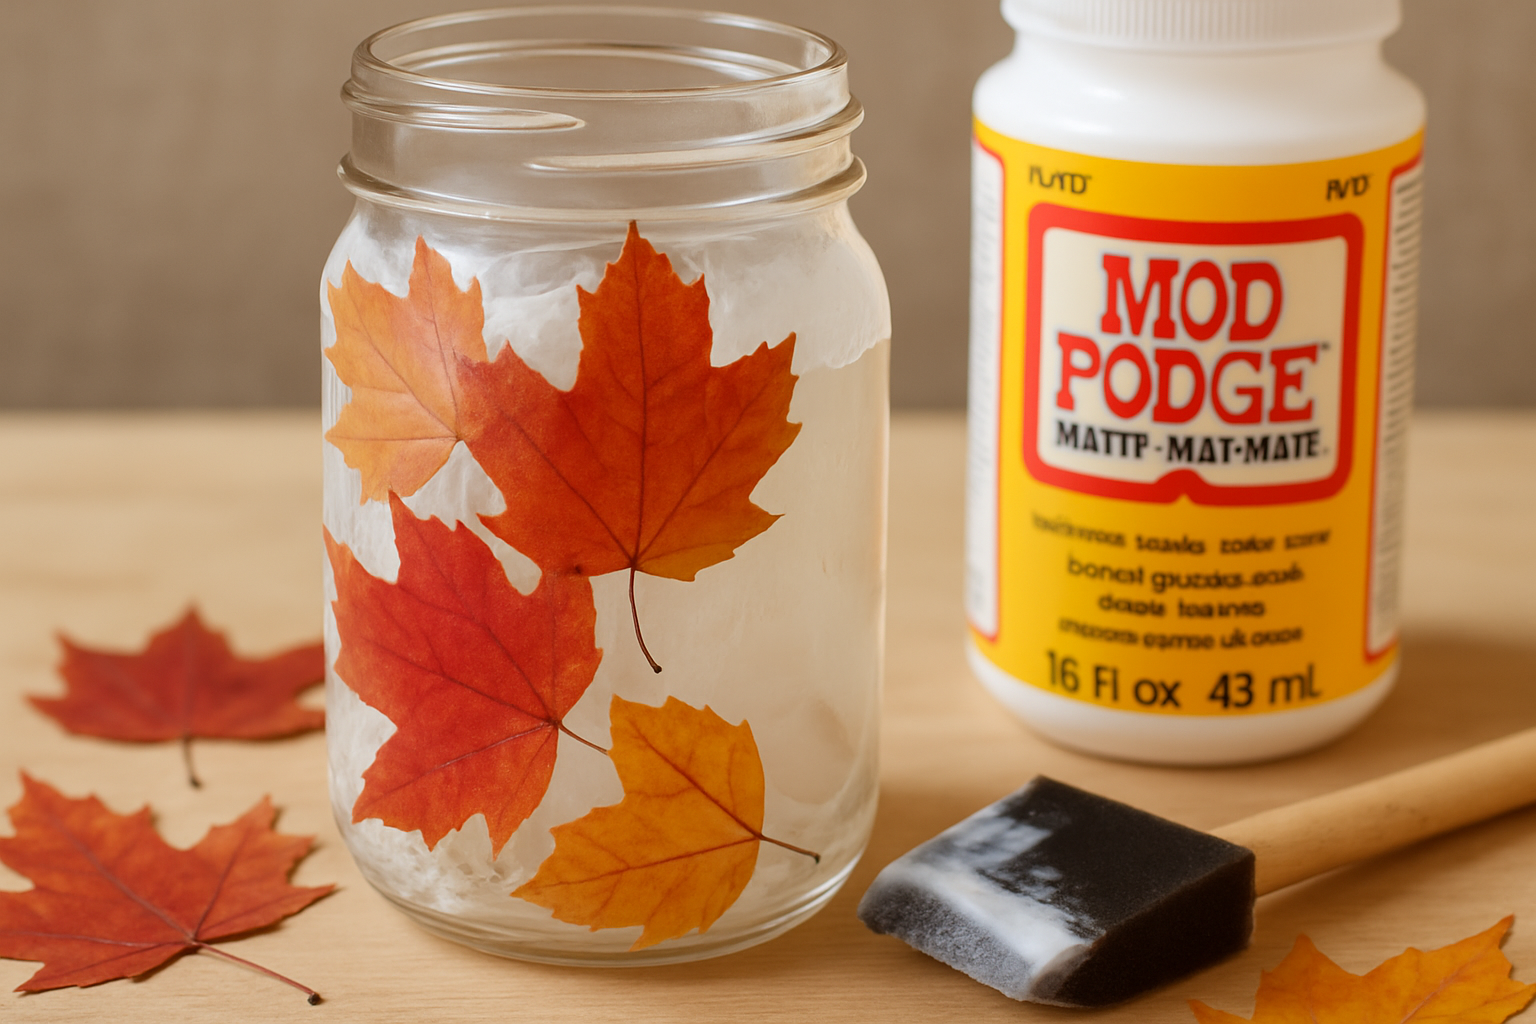
Continue this process, overlapping leaves slightly as desired, until the jar is covered to your liking. You can create a dense, layered look or a more sparse design. Remember to leave the top rim and bottom clear if you plan to add decorative twine or ribbon later.
Step 7: Allow to Dry
This is a crucial step! Let the Mod Podge dry completely. This can take several hours, or even overnight, depending on the thickness of your Mod Podge layers and the humidity. The Mod Podge will dry clear, leaving your leaves beautifully preserved on the jar.
Step 8: Add Lighting
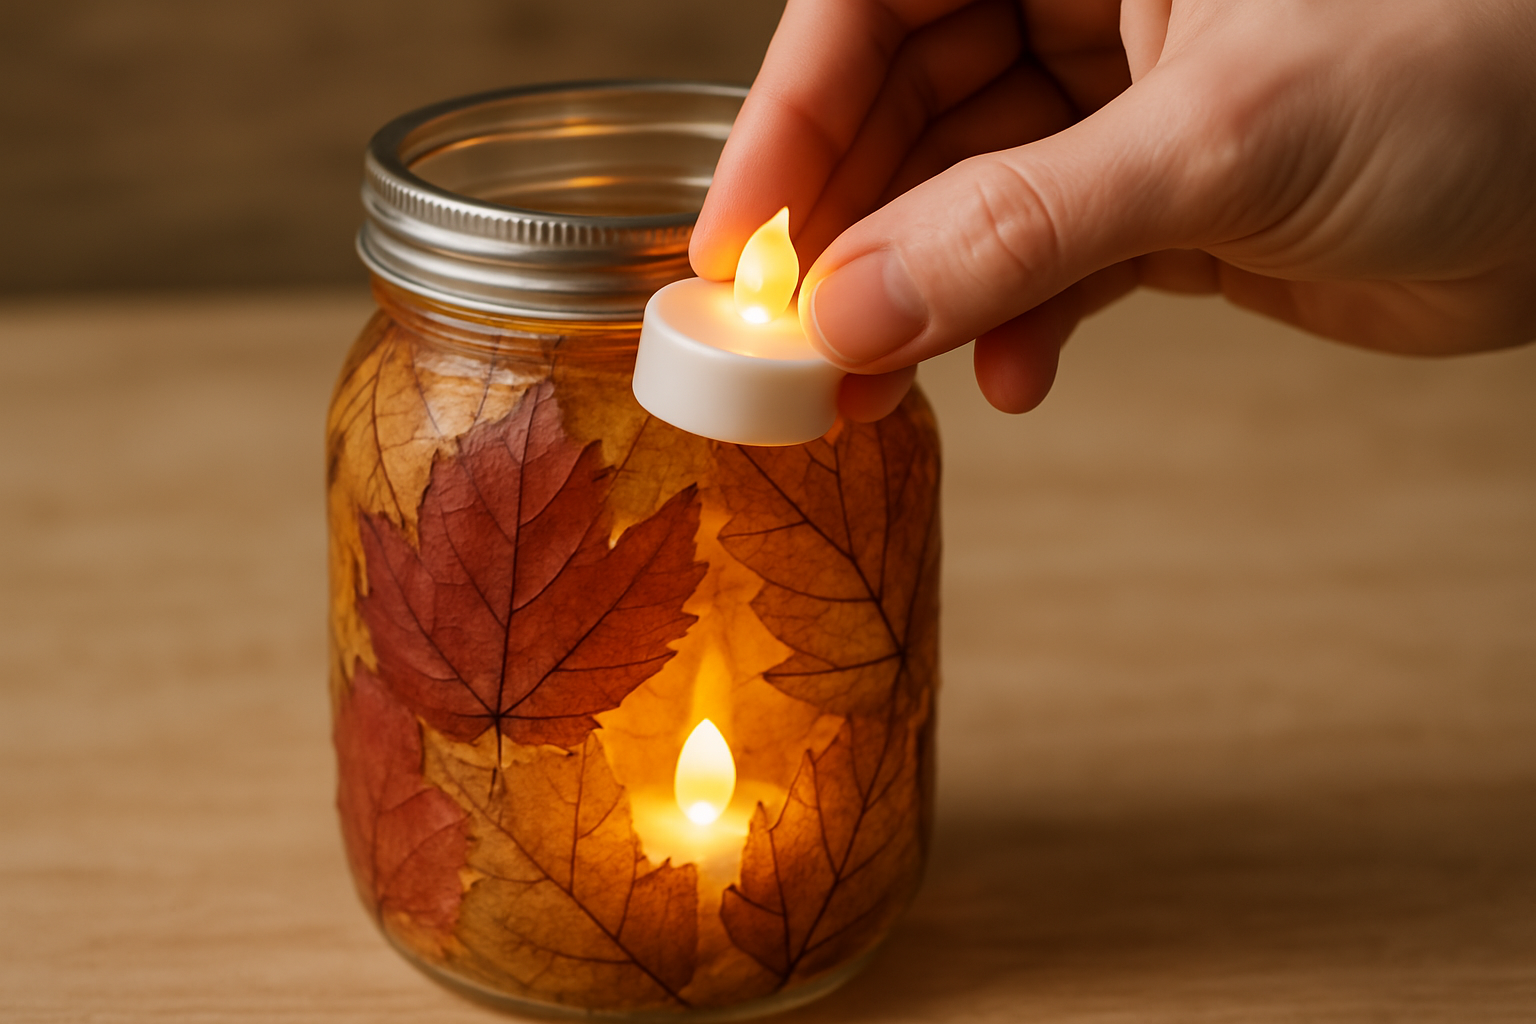
Once your lanterns are completely dry, it’s time to add the magic! Carefully place a battery-operated LED tea light or a string of small fairy lights inside each mason jar. These provide a safe, warm, and enchanting glow.
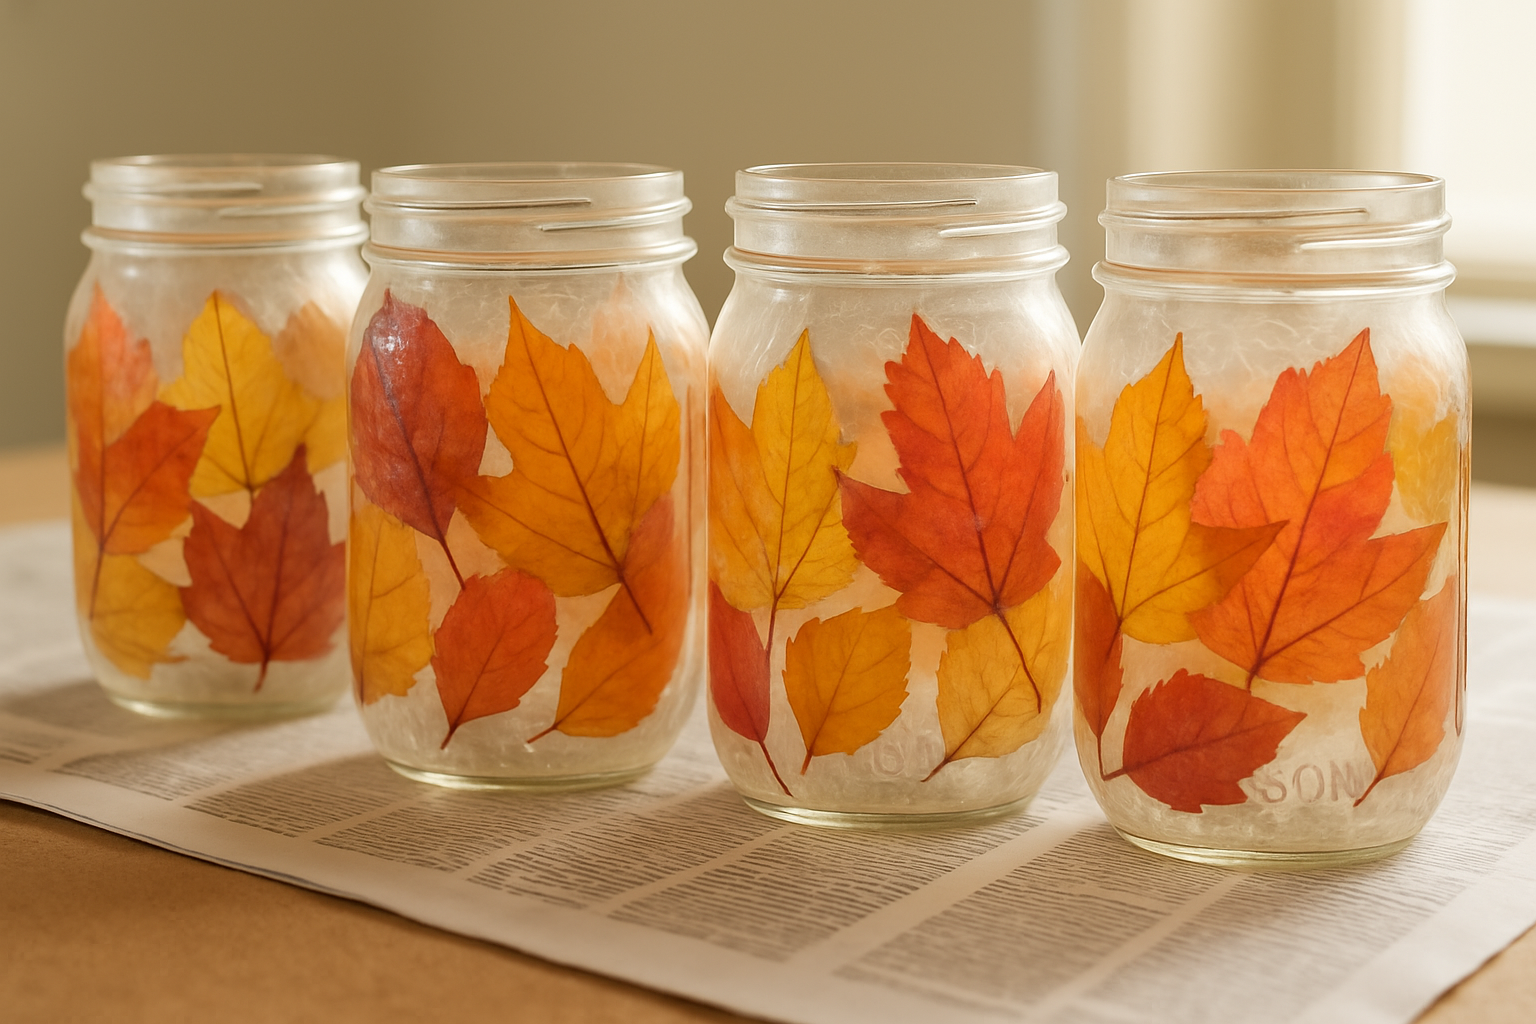
Step 9: Display Your Lanterns
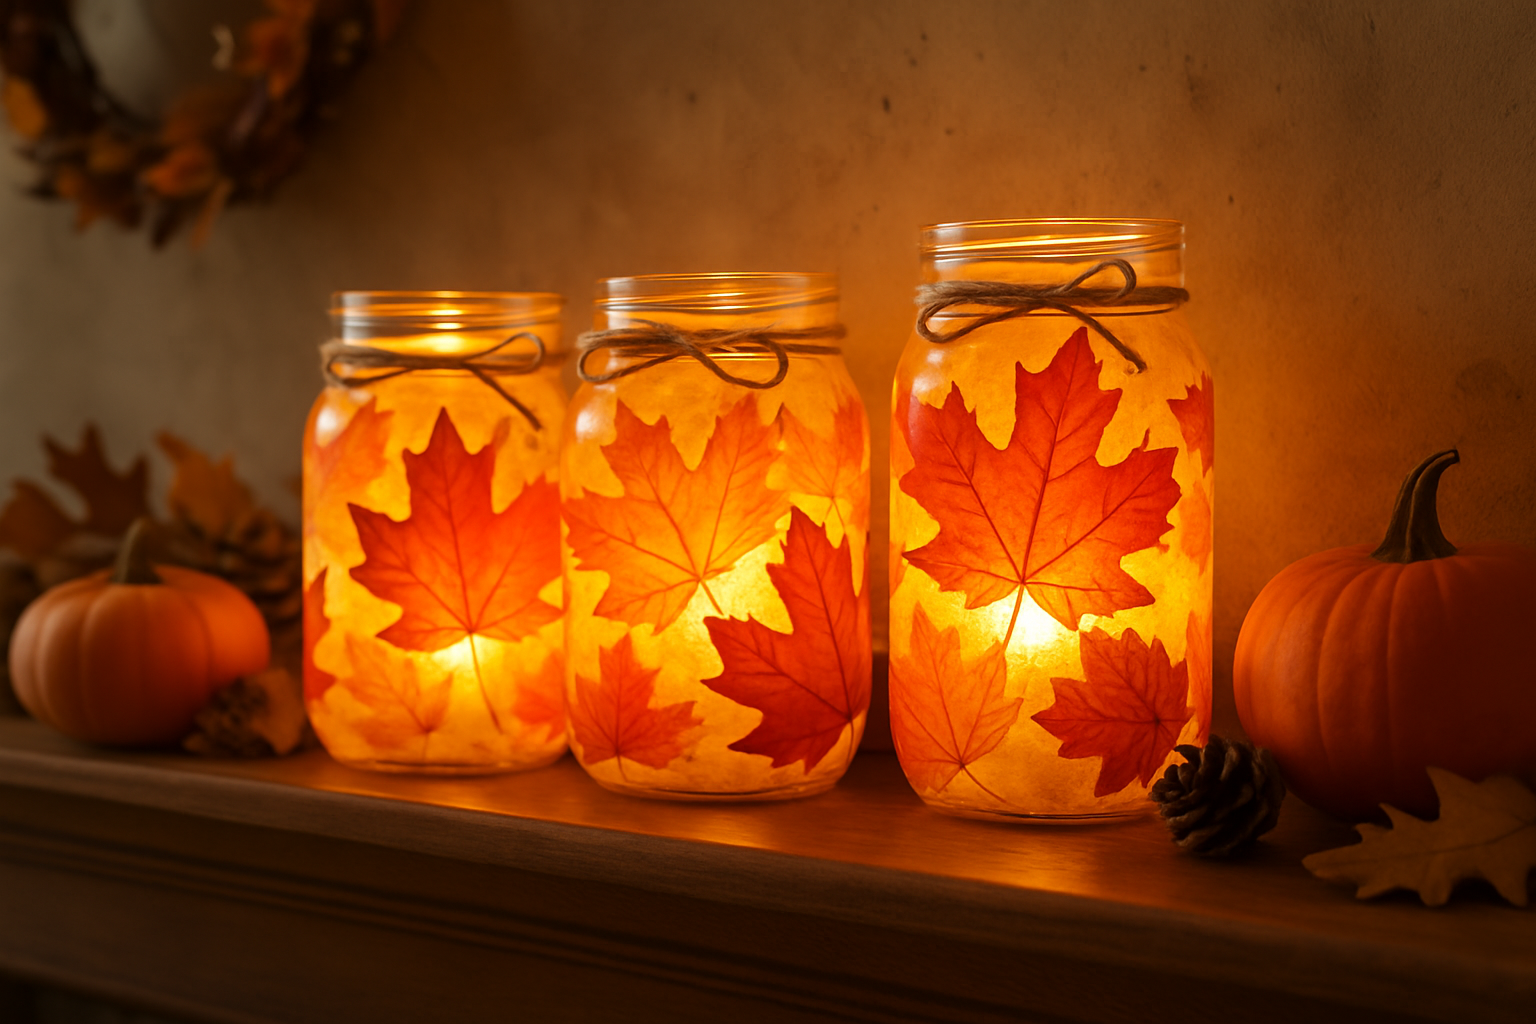
Finally, arrange your beautiful new Mason Jar Leaf Lanterns! They make stunning centerpieces for your dining table, cozy accents on a mantelpiece, or charming decorations for an outdoor patio. Enjoy the warm, autumnal glow they bring to your space!
Tips and Variations
- Leaf Selection: Experiment with different types and colors of leaves for varied effects. Maple leaves offer vibrant reds and oranges, while oak leaves provide interesting shapes.
- Mod Podge Finish: Use matte Mod Podge for a subtle, natural look, or gloss Mod Podge for a shinier, more polished finish.
- Additional Embellishments: Once the Mod Podge is dry, you can tie twine, ribbon, or raffia around the neck of the jar for an extra decorative touch.
- Outdoor Use: If you plan to use these lanterns outdoors, ensure they are protected from rain and moisture, as Mod Podge is not fully waterproof. Consider a clear, outdoor-safe sealant spray for added durability.
- Gift Idea: These lanterns make wonderful handmade gifts for friends and family, especially during the fall season.
Conclusion
Creating Mason Jar Leaf Lanterns is a rewarding and enjoyable craft that allows you to bring the beauty of nature indoors. With just a few simple materials and a little creativity, you can craft stunning luminaries that add a warm and inviting ambiance to any space. We hope this step-by-step guide has inspired you to create your own magical fall glow. Happy crafting!